.png "Product News, Tutorials, Tips and Industry Insights - ZWSOFT Blog - Stay up to date on the latest product news, tutorials, tips, and industry insights from ZWSOFT staff and influencers. Here we provide everything you need to help you get the most out of ZWSOFT products and succeed in your career.")
Timelapse photography, widely used in nature documentaries, urban studies, and other aspects, compresses hours or days of activity into a short, captivating video. So, in this way, capturing a 3D print timelapse can be an exciting way to showcase the fascinating process of 3D printing. Imagine your video lasts only tens of seconds but captures over 8 hours of printing, showcasing the intricate and gradual creation of objects layer by layer.
For those who want to create an impressive 3D printing timelapse video, this guide will walk you through everything you need to know. Let’s get started now.
| Note: If you are ready to change 3D modeling software and are looking for cost-effective solutions, don’t miss ZW3D 2025. It’s a CAD/CAE/CAM solution for both beginners and professionals. To learn more about it, you can visit the product page or download and try it for free for 30 days. |
Before You Start Capturing 3D Print Timelapse
Before starting a 3D print timelapse, it’s important to make preparations in advance. Planning ahead and getting everything will ensure a recording process and ultimately result in a successful outcome. Let’s begin by outlining the items needed for this project.
What You Will Need
First of all, you will definitely need the most basic things when 3D printing, such as 3D model files, 3D printing software, 3D printer, and power supply. Also, you will need some equipment and tools to capture high-quality 3D printing timelapse videos. These additional tools will help you capture clearer and more stable images, and enhance your video production and editing experience. Here are some tips you may need, along with suggestions for using them:
- Camera: Choose the best camera for 3d printing timelapse within your means. The easiest option is a cell phone, and you can also use digital cameras such as a DSLR camera. For more specialized needs, sports cameras such as GoPro are also a great option. Whichever device you choose, make sure it has the following features: high resolution, good video recording capabilities, and the ability to shoot for a long time.
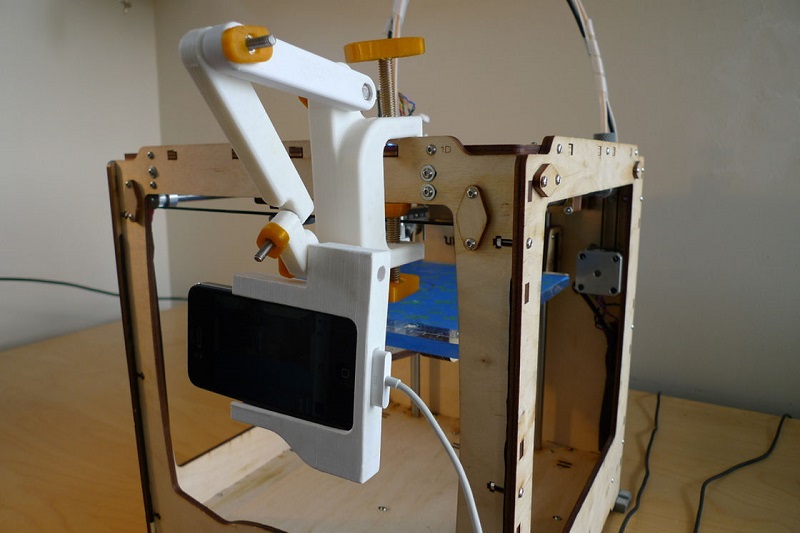
- Stands: Stands are key to ensuring that your camera equipment is stabilized for shooting. You can choose a support device such as a tripod, head, or stabilizer. Make sure your stand is sturdy and durable, able to support the camera equipment stably throughout the 3D printing process, and allows for flexible angle adjustments to capture the best footage.
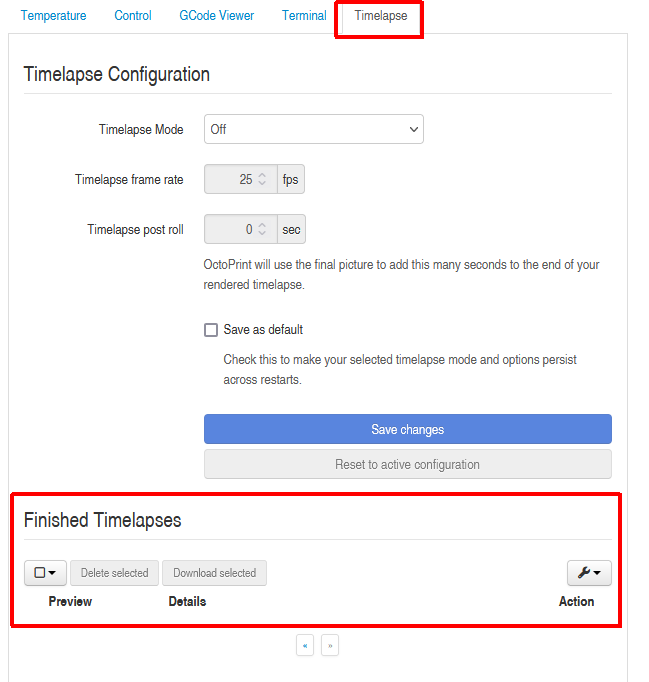
- Video editing software: You have options like Adobe Premiere Pro, Final Cut Pro, DaVinci Resolve, and other video editing software. And of course, you can use OctoPrint before the actual printing. It has an Octolapse plug-in that allows you to take images at specific times or with each layer print to create 3D print timelapse videos. Once the print is over, OctoPrint then compiles these images into a video which you can easily download and share.
Key Considerations
To achieve a good result when shooting a 3D print timelapse, there are some factors you need to consider:
- Optimize Retraction Settings – Proper retraction settings can minimize stringing, reduce unwanted artifacts, and ensure a cleaner print and a more visually appealing timelapse.
- Tighten Loose Parts – Any components in your printer that freely move, particularly the trigger mechanism, can cause vibrations that affect your timelapse. Ensure that all the parts are fitted well to enhance the stability and not spoil the shot.
- Consider Power and Equipment Stability – Stable equipment and particularly uninterrupted power supply is very important in long-duration prints. If there is a power failure or instability of any printing equipment, this will stop the printing and recording and, in turn, produce incomplete or useless timelapse videos.
- Pre-test – A test print is recommended so that any problems with the setup can be detected and fixed. This enables you to change the angles of the camera, lighting, and printer settings to make a success out of your timelapse photography.
- Maintain a Clean and Safe Environment – A clutter-free workspace reduces the risk of accidents and interruptions. Inform others with a note to avoid touching the printer or turning off the lights, as this can interfere with the timelapse recording and affect the final video quality.
How to Make a 3D Printing Timelapse
Making a 3D printing timelapse is a complex process that requires some crucial steps to make the final video interesting and informative. Let us begin the process.
Step 1. Choose the Shooting Position and Lighting
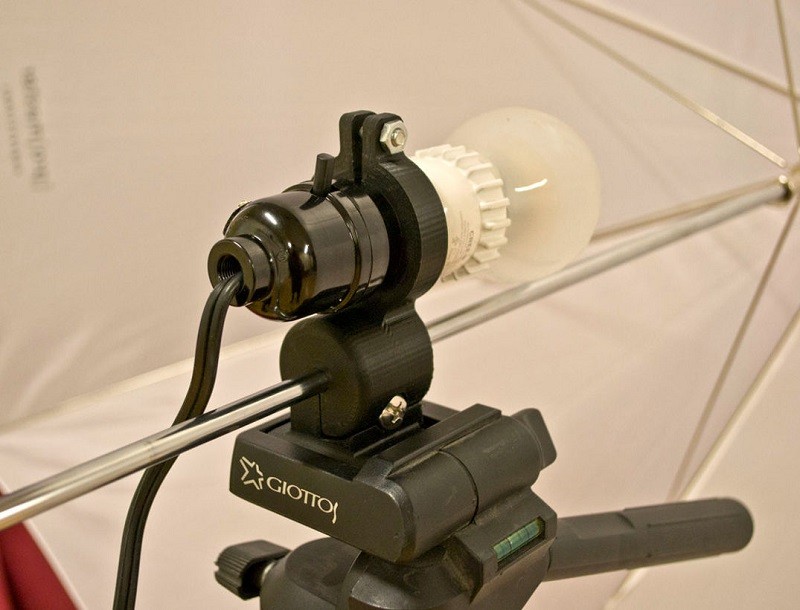
The first step in planning a 3D print timelapse is choosing the right place to shoot. You should first set up your printer in a controlled environment where there is plenty of light but not direct sunlight to avoid sharp shadows and glare. A small room is preferable.
It is also advisable to have constant lighting. For example, you can use LED lights to ensure even light intensity throughout the printing process.
Ensure that your camera is placed visibly without any interference or obstruction. Ideally, the camera should be about 2 to 3 feet from the printer, although you may need to experiment with the camera focus and the framing. Make sure the camera remains stable throughout the print process by securely mounting it securely on a tripod or other stable support.
Step 2. Set Camera Parameters
To capture a good quality 3D print timelapse, you should be careful with the camera parameters as well. Choose a high-resolution video quality camera that is of at least 1080p to get high-quality images. The shooting interval is also important and should match the 3D print speed. For longer prints, let’s say those lasting over 8 hours, a high frame interval is recommended, such as 30 seconds. While for shorter prints, the interval of 5 to 15 seconds is useful in capturing more detail.
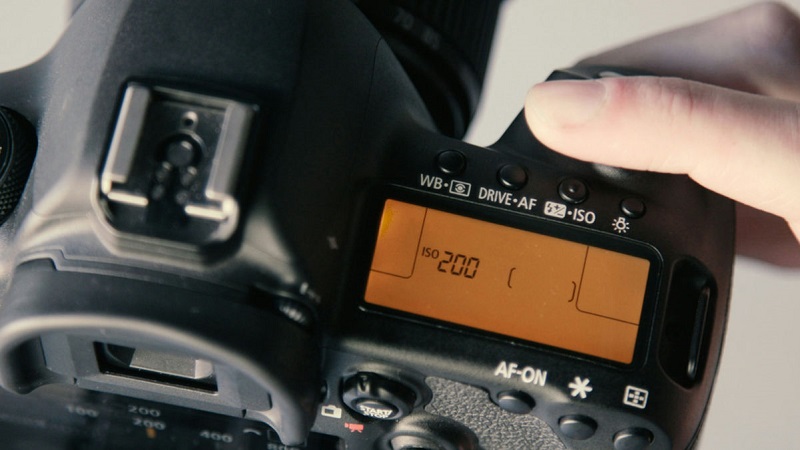
Depending on the type of timelapse, particular software and tools will help improve the shooting. For example, OctoPrint has plugins such as Octolapse that take a picture each time there is a change in layers and produce a perfect timelapse. Smartphone apps such as Lapse It and Framelapse give more options for interval controls and other options to fine-tune your video. Other camera settings, including the exposure time, ISO sensitivity, and white balance, should also be adjusted in order to increase the quality of the pictures in the print.
Step 3. Reduce Vibrations of the Printer
Vibrations also play a significant role in achieving the best 3D print timelapse, as they can degrade the quality and clarity of the timelapse. Put your printer on a sturdy 3d printer table. An effectively constructed table helps to minimize unwanted vibrations that will cause timelapse blur. Moreover, you can also try placing rubber pads or any other anti-vibration feet under your printer to reduce the small oscillations that the movement of the printer may bring.
Step 4. Start Shooting, Testing, Adjusting
Before an actual shooting, having a test can help avoid potential problems, such as inadequate lighting, improper focus, or poor framing. Test the trigger to ensure a successful capture and check for interruptions, such as shadows caused by moving parts or reflections from shiny surfaces. Based on the test results, adjust your camera settings, shooting intervals, and positioning. Once you are confident with the test footage, proceed to record the entire print.
Step 4. Complete and Edit
After you are done shooting all your scenes, transfer the footage to an editing software for further processing. Crop it and adjust the exposure, contrast, and color balance so every frame captures the best look. You can apply transitions between frames to make the switching smooth and easy on the eye, as well as add background music or sound effects to enhance the presentation. Additionally, it might be worth increasing or decreasing the speed of certain parts to focus on specific moments in the printing process.
Tip: If you use OctoPrint, simply navigate to the “Timelapse” tab in the OctoPrint interface, where you will see a list of recorded timelapses. Select the desired file and download it for further editing.
FAQs About 3D Print Timelapse
What Is the Best Camera for 3D Printing Timelapse?
Among the available options in the market, Beagle Camera can be considered one of the best out there. It is easy to set up. The supported frequency bands are 2.4GHz and 5GHz. Downloading the “Beagleprint” app and connecting via Wi-Fi, you can effortlessly begin recording without the hassle of SD cards. This camera has both focus and digital zoom for better, sharper pictures, which are crucial for timelapses. Through it, you can monitor and control your 3D printer regardless of the distance using a PC browser and an app.
Offering 4 auto timelapse modes, Beagle Camera is also compatible with almost all FDM 3D printers, including Ender 3, Artillery Sidewinder X4 PRO, and others, which means you will be able to use it for all your timelapse activities.
What Are the Benefits of Creating a 3D Print Timelapse?
3d printing timelapse condenses the entire printing process into a concise video, showcasing each step and detail clearly. This way, by making such kinds of videos, you can achieve many purposes. Here are some benefits.
- Visualization of the Printing Process: Gives an account of the whole process from the beginning to the end of the print, recording every single aspect.
- Educational Tool: Avail deeper knowledge of processes used in 3D printing and methods that can be used to accomplish the printing for 3d fans, students, and professionals.
- Monitoring and Quality Control: Real-time monitoring is possible to ensure that problems are solved as soon as they arise, thus improving print quality and productivity.
- Promotion and Showcase: Perfect for advertising 3D printing services and products, establishing a consumer base, and showcasing advancement.
- Documentation and Analysis: It serves as a database for assessing and enhancing the print settings employed in print processes to enhance its flow.
Conclusion
A good 3d print timelapse involves both processes and results. The use of some of the abovementioned techniques will mean that the result not only grabs the viewers’ attention but also shows off the fine details of the prints. This process requires a very careful choice of equipment, correct settings on the camera, and perfecting of the shooting environment so that the layers and details are captured in their entirety.
It also becomes a form of documentation that can help you view the development of your project and the changes in your methods. Regardless of whether the target audience is the clients, colleagues, or social media, the adequately prepared 3D print timelapse is memorable. Therefore, do not wait and hesitate to start with this creativity. Record, produce, and document your story. Begin your artwork right now!