.png "Product News, Tutorials, Tips and Industry Insights - ZWSOFT Blog - Stay up to date on the latest product news, tutorials, tips, and industry insights from ZWSOFT staff and influencers. Here we provide everything you need to help you get the most out of ZWSOFT products and succeed in your career.")
As technology advances, more people are exploring how to 3D print to turn their creative ideas into tangible objects. This technology is now widely used in industries such as manufacturing, healthcare, education, architecture, and fashion. However, one common issue you may encounter when starting with 3D printing is that the print does not stick to the bed, leading to print failures or poor-quality outcomes.
A 3D print not sticking to the bed means that during the printing process, the material does not effectively adhere to the print bed (or build platform), causing the print to move, warp, or detach during the process.
If you’re looking for answers to “Why is my 3D print not sticking to the bed” and “How to solve this annoying problem,” keep reading. We will discuss the common causes of print bed adhesion issues in detail and provide 8 simple solutions to help you overcome this challenge, thereby increasing your print success rate and quality. Whether you are a beginner or an experienced 3D printing user, you will find practical advice and tips in this article. Let’s get started.
| Note: ZWSOFT recently launched ZW3D 2025, which not only meets 3D modeling needs but also offers numerous advanced features to enhance efficiency for professionals. Of particular note, it supports a one-time purchase. If interested, you can download a trial. |
Fix 1. Adjust the Distance Between the Nozzle and the Bed
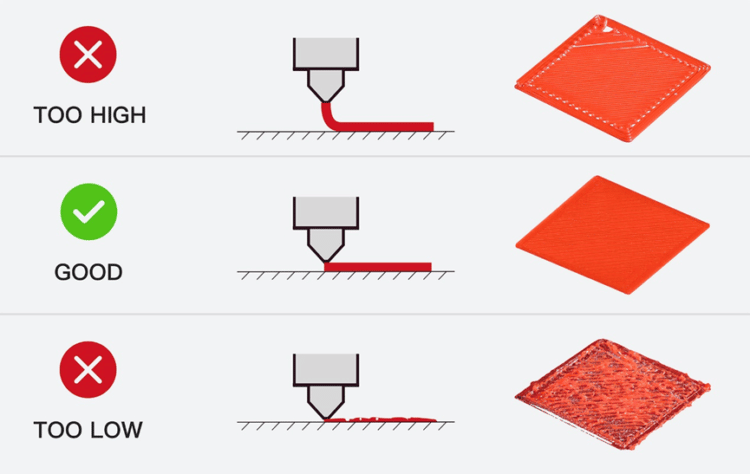
In 3D printing, the distance between the nozzle and the print bed (also known as the Z-axis) is crucial. If this distance is too large, the first layer of print material may only loosely adhere to the bed, leading to warping or deformation as subsequent layers are built on an unstable foundation. If the distance is too small, the 3D printing extruder may struggle to extrude filament properly, resulting in an overly thin or uneven first layer.
To address the issue of 3D prints not sticking to the bed, you can adjust the distance between the nozzle and the print bed to ensure that the material adheres firmly to the bed on the first layer. Ideally, the nozzle should be close enough to touch the print bed without excessively compressing the material. The typical distance is around 0.1 mm.
Here are the steps to adjust the nozzle-to-bed distance:
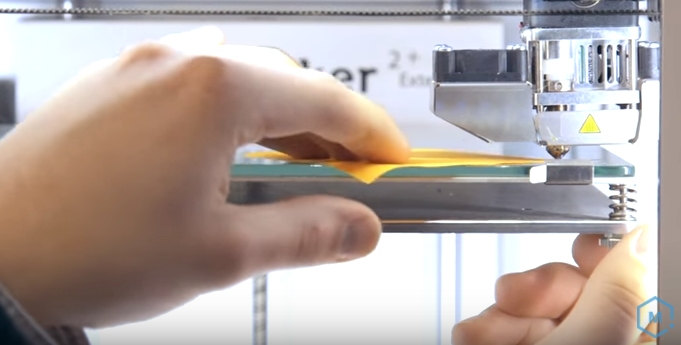
- You can use a thick piece of paper or a specialized leveling tool, placing it between the nozzle and the bed.
- Adjust the nozzle height so that the paper can slide with slight resistance but is not loose.
- Check the nozzle height at the four corners and the center of the print bed to ensure uniformity.
- Before starting your print, it is best to run a test to verify that the filament adheres well at this height.
- Make any necessary fine adjustments based on the test print results to achieve optimal bed adhesion.
Fix 2. Reduce the Printing Speed of the First Layer
If you find that your 3D print filament isn’t sticking to the bed, a common reason could be that the print speed is too high, especially for the first layer. High speeds can prevent the material from adequately cooling and solidifying on the print bed, leading to poor adhesion. Additionally, increased speed may cause the material to shrink before fully adhering, which can result in edge lifting, particularly with materials that have a high coefficient of thermal expansion.
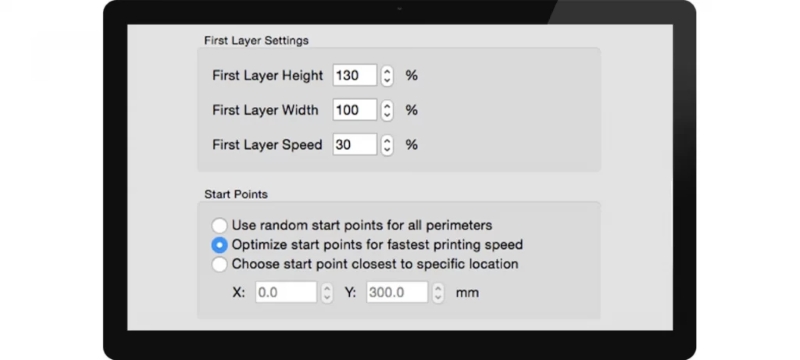
To address this issue, you can reduce the print speed, allowing the material more time to cool and adhere to the print bed. Slower speeds ensure that the material is extruded evenly from the nozzle and forms a uniform first layer, which is crucial for the quality of subsequent layers. Adjusting the first layer print speed depends on the slicing software used by your printer. Here’s a general approach:
- Open your 3D slicing software and navigate to the print settings.
- Locate the option for first layer print speed.
- Reduce the first layer print speed to 50% or lower than the usual speed. For example, if your normal print speed is 60 mm/s, set the first layer speed to around 30 mm/s.
Fix 3. Level the Print Bed
An uneven print bed is also a reason for 3D prints not sticking to the bed as it can cause uneven distances between the nozzle and the bed. If the bed isn’t level, areas where the distance is too close may result in over-extrusion or nozzle clogging, while areas with too much distance may cause poor adhesion. In this case, you can level the print bed to make 3D prints firmly stick to the bed.
Different printers have various methods for bed leveling, some with automatic leveling features. If not, you can manually level it. A common method is the “paper test,” where you place a sheet of regular paper between the print bed and nozzle. Adjust the knobs or screws under the bed until the nozzle lightly touches the paper without compressing it. Then adjust all four corners and the center, ensuring uniform gaps at each point. Lastly, ensure no plastic residue is present on the nozzle or bed during testing, and both are at room temperature.
Fix 4. Increase the Extrusion Temperature
In addition to nozzle height and print speed, temperature is another crucial factor affecting adhesion in 3D printing materials. Different filaments have specific melting points. If the temperature is too low, the material may not fully melt, leading to uneven extrusion and spreading. After rapid cooling, the first layer of the 3D print will not stick to the bed. Therefore, increasing the extrusion temperature appropriately can solve adhesion issues.
Here are the steps:
- Each material has its optimal extrusion temperature range. Thus, consult the filament manufacturer for the recommended extrusion temperature. For example:
-
- PLA: 180°C – 220°C
- ABS: 240°C – 250°C
- PETG: 210°C – 250°C
- Open your 3D printing software and navigate to the print settings page. Locate the extrusion temperature setting option.
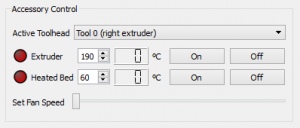
- Set the extrusion temperature initially to the midpoint of the recommended range. Print a calibration model to test the effectiveness: observe the extrusion flow and adhesion of the first layer. Adjust the temperature gradually based on the test results.
- If the filament still doesn’t adhere well, increase the extrusion temperature by 5-10 degrees Celsius incrementally until you find the optimal temperature where the filament adheres properly to the print bed.
Fix 5. Change the Cooling Settings
When material exits the nozzle and deposits onto the build platform in 3D printing, it rapidly cools. Some 3D printers are equipped with cooling fans to accelerate this cooling process. While these fans help ensure filament solidifies quickly before stacking new layers to prevent sagging, they can also contribute to adhesion issues on the print bed.
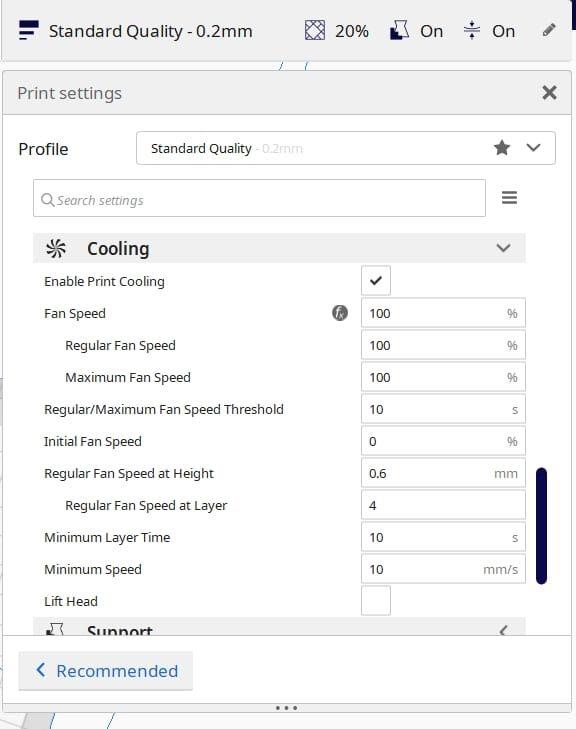
If you notice that the first layer initially adheres to the platform but later warps or detaches during cooling, it may be due to cooling settings. To address this issue, you can adjust the cooling settings based on the characteristics of the filament:
- For low-temperature melting materials like PLA, it’s recommended to use 50-100% cooling fan speed to promote quick solidification without causing warping.
- High-temperature melting materials like ABS are more sensitive to rapid cooling, which can lead to warping and cracking. Lower cooling fan speeds or even disabling cooling altogether may be more appropriate for these materials.
Fix 6. Try a Heated Bed
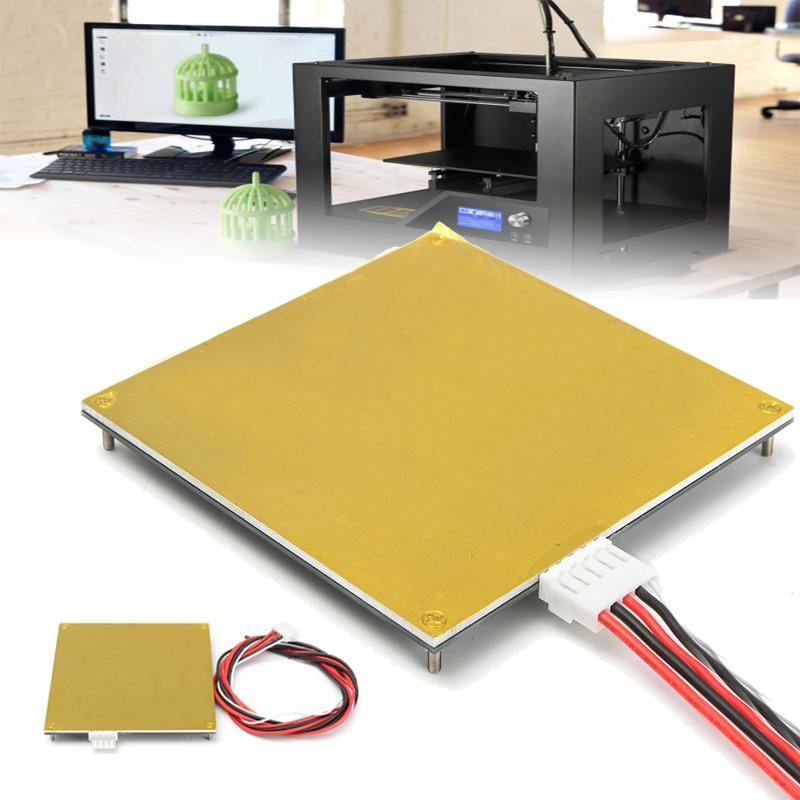
Some 3D printers designed for engineering plastics like ABS, PETG, Nylon, etc. are equipped with a heated bed feature. If your printer has this capability, you can use it to address adhesion issues during 3D printing. A heated bed provides uniform heat across the print surface, ensuring it stays warm. This helps newly extruded molten filament maintain some softness upon contact with the bed, improving adhesion. A heated bed also reduces the rate of material cooling and shrinkage, thereby reducing the likelihood of warping, especially for materials prone to warping like ABS.
Different materials require different heated bed temperatures. For example:
- PLA: 50°C – 70°C
- ABS: 80°C – 110°C
- PETG: 50°C – 80°C
To set the heated bed temperature, you can find the option in your slicing software under the “Material” or “Temperature” tab. Set the heated bed temperature according to the recommended range for your material. For example, for PLA, you can set the heated bed temperature to 60°C.
Fix 7. Use Brims and Rafts
When printing very small parts with minimal contact area to the build platform, achieving adhesion can be challenging. In such cases, you can utilize brims or rafts to make the model stick to the bed.
A brim is a perimeter of multiple thin layers surrounding the bottom edge of the model. It extends the contact area of the model’s bottom, enhancing adhesion between the filament and the print bed. A 3D printing raft is a single or multiple layers of a base printed beneath the model. It creates a stable foundation between the print bed and the model, preventing the model from moving or warping during printing.
To use brims, navigate to the print settings related to brims in your slicing software. This option is typically found under “Build Plate Adhesion” or similar tabs. Set the “Brim Width” or “Brim Line Count.” It’s generally recommended to use 5 to 10 lines to ensure an adequate contact area.
Similarly, to use a raft, select “Raft” in your slicing software under “Build Plate Adhesion” or similar tabs. Set the number of raft layers and density. Often, default settings work well for most prints.
Fix 8. Opt for Another Platform Surface
If you find that you’re 3D prints not sticking to the bed after trying the aforementioned methods, consider changing the printing bed surface. Different printing bed surfaces, such as glass, PEI sheets, BuildTak, blue painter’s tape, etc., offer varying adhesion characteristics. For example, glass is a popular choice. However, it may pose adhesion issues with materials like ABS.
Therefore, many printers include specialized build platform surfaces like PEI sheets and BuildTak, which provide good adhesion suitable for engineering plastics such as ABS and PETG. If your printer does not have these specific platform surfaces, you can also opt for adhesive tapes. For instance, PLA tends to adhere well to blue painter’s tape, while ABS typically adheres better to Kapton tape. Choosing the right bed surface material can significantly improve adhesion and ensure successful 3D prints.
FAQs About 3D Prints Not Sticking to Bed
What Type of Material Has the Best Adhesion for 3D Printing?
One of the materials with the best adhesion properties is PLA (polylactic acid), a low-temperature melting, eco-friendly thermoplastic. It provides good adhesion at room temperature without the need for a heated bed, but using a heated bed (around 60°C) can further enhance adhesion.
In addition to PLA, common printing materials include ABS, PETG, TPU, and Nylon. Compared to PLA, ABS and Nylon have higher requirements for the print bed, needing a high-temperature heated bed (80°C – 100°C) to prevent warping and cracking. While PETG and TPU can also offer good adhesion with the aid of a heated bed, they do not match the ease of use and stability of PLA. Therefore, PLA is one of the materials with the best adhesion properties.
What Temperature Should I Set the Bed for PLA 3D Printing?
For PLA (polylactic acid) 3D printing, the recommended bed temperature range is typically between 50°C and 70°C. Within this range, PLA softens slightly upon contact with the print bed, improving adhesion and reducing the risk of warping. Although PLA provides good adhesion at room temperature, if the bed temperature is too low, the first layer may fail to stick, increasing the risk of edge curling.
Conversely, if the temperature exceeds 70°C, PLA may become too soft, leading to excessive adhesion. This can make it difficult to remove the print from the bed and may damage the print or the bed surface.
Conclusion
3D prints not sticking to the bed is a common issue in 3D printing. This can be caused by several factors, such as incorrect distance between the print bed and the nozzle, fast printing speed of the first layer, or an uneven print bed.
To help you resolve this issue, we have summarized eight solutions in this article. We hope that these tips will provide you with some insights and help you improve the 3D printing experience, resulting in higher quality and more successful prints.