.png "Product News, Tutorials, Tips and Industry Insights - ZWSOFT Blog - Stay up to date on the latest product news, tutorials, tips, and industry insights from ZWSOFT staff and influencers. Here we provide everything you need to help you get the most out of ZWSOFT products and succeed in your career.")
The potential of 3D printing is constantly being explored. It has also gradually shifted from the high-precision industrial field to homes and small businesses, becoming a new favorite among makers and DIY enthusiasts. In this case, understanding how to 3D print seems a new way to take your work to the next level.
However, if you’re a green hand, various devices, software, and materials may be overwhelming when you want to get your desired items printed on a 3D printer. To help you out, this post will start with basic concepts and the 3D printing process to tell you how to 3D print something and bring it to life. Now, let’s dive in!
What Is 3D Printing? What Can You 3D Print?
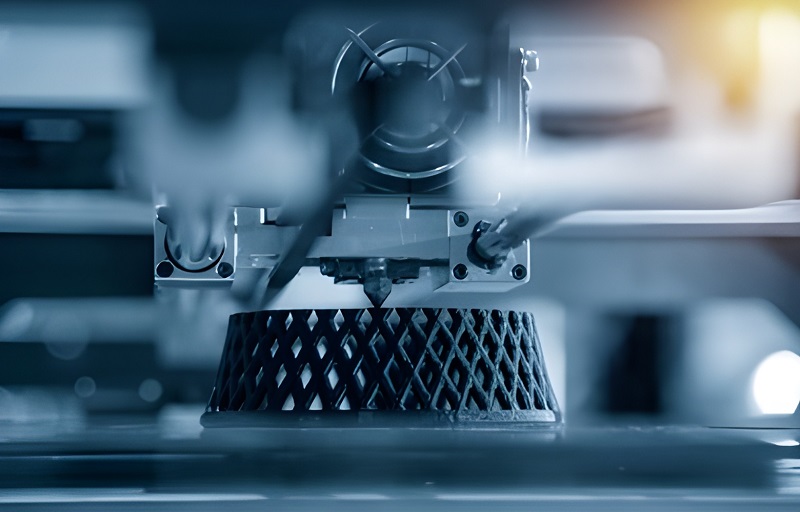
You might not be familiar with 3D printing procedure, but you’ve likely heard of or seen the process of creating items by cutting away material from a raw piece. This is called subtractive manufacturing. 3D printing, on the other hand, is the opposite. It belongs to additive manufacturing and creates three-dimensional objects by adding material layer by layer on a 3D printer, measured in millimeters.
Compared to the former, 3D printing offers greater flexibility and customization. Coupled with the increasing precision, it is now used in various industries, such as aerospace, automotive, medical, and more, to produce a wide range of practical items and tools. Here are some common objects that can be made with a 3D printer.
- Rapid Prototypes: 3D printing is a great way to create prototypes of new products. This can help you to save effort and money in the further development process;
- Tools and Gadgets: 3D printing can be used to print wrenches, parts, and other industry-specific tools and gadgets for specialized and standard tasks;
- Medical Items: Many implants and prosthetics are now 3D printed. They better adapt to the human body and cause less rejection. Also, some customized surgical tools are made using 3D printing;
- Consumer Goods: 3D printing offers a new direction for personalized products. It can turn your imaginative phone cases, accessories, and home decor into reality;
- Educational Tools: Models, laboratory equipment, research tools, and other items for STEM subjects can all be generated from 3D printing. They are precise and can be designed to be lightweight to use;
- Entertainment Toys: For young children, 3D printing can customize toys like puzzles, board games, and musical instruments.
How to 3D Print with FDM (Step by Step)
Different 3D printers work in a similar way, but various materials and technologies have given rise to different technology types, such as FDM (Fused Deposition Modeling), SLA (Stereolithography), SLS (Selective Laser Sintering), etc. Among these, FDM is the most general and suitable for small-scale or personal use. Therefore, this part will use FDM as an example to show you how to 3D print.
Step 1. Get the Design File Ready
The most essential part of the 3D printing steps is the 3D model. Websites like Thingiverse, CGTrader, and Printables can help you get some free 3D models. Alternatively, you can try creating models yourself with CAD software like AutoCAD, SolidWorks, and Rhino. However, if you are a beginner, ZW3D is more recommended as the learning curve for the other options is quite steep.
ZW3D comes with eight major toolsets, including mold, sheet metal, and piping. It also offers parametric, direct, and surface modeling the three methods to meet your skill needs. In addition, compatible with various APIs, ZW3D can achieve automated operations to help reduce workloads. Even better, it is easy to get started with. Not only does it have a simple and quick interactive interface, but it also provides rich learning materials. For those who want to explore 3D printing step by step, it’s worth a try.

| Note: Even better, the ZW3D 2025 has recently been released, enhancing user experience and boosting productivity. If you’re interested in trying it out, you can download it for free from the download center and enjoy the 30-day free trial. |
Step 2. Choose a 3D Printer and Material
Now you need to choose a suitable 3D printer to perform FDM. It’s recommended to choose a printer with a stable nozzle and body to prevent vibrations from affecting the final product’s appearance. In addition, you’d better compare different options and decide whether to buy or rent based on your needs and budget.
Besides the printer, printing material is crucial at this stage. Given that FDM 3D printing can use various materials, you can refer to the following for selection based on the model requirements.
- PLA (Polylactic Acid): Multiple colors, minimal warping, and available for prototypes, educational, and household items;
- ABS (Acrylonitrile Butadiene Styrene): Requires a heated bed but is durable and heat-resistant. Suitable for parts and toys;
- PETG (Polyethylene Terephthalate Glycol-Modified): Tough, flexible, chemical-resistant, and works for mechanical parts and food containers;
- HIPS (High Impact Polystyrene): Strong and used as a support material for complex models;
- Nylon: Strong, flexible, wear-resistant, and often used for parts and prototypes;
- Different Filled Filaments: Three options of wood, metal, and carbon fiber. They are mixtures of PLA and the respective powders and can be used to enhance the texture of the model.
Step 3. Set Up the 3D Printer
Once the 3D printer is in place, follow the instructions to correctly and securely assemble the components. The print bed and nozzle are especially important. Both must be kept clean to prevent dirt from sticking to the printed model or clogging the nozzle, which can impede proper operation.
Additionally, pay special attention to leveling the print bed. Depending on your 3D printer, you may need to manually or automatically adjust the distance between the nozzle and the bed until it is proper. This is crucial for ensuring the first layer of the model is built smoothly and accurately. When all the printer settings are ready, load the filament into the printer and heat it to its melting temperature to proceed with the final printing step.
Step 4. Start 3D Printing
3D printers typically support formats such as STEP, STL, and OBJ. Check which formats your printer supports and export your prepared model accordingly. If you are using ZW3D, you can find the “Save As” option in the File menu for exporting.
Next, use slicing software like Cura or PrusaSlicer to configure settings such as print speed, temperature, wall thickness, infill percentage, and layer height. And convert the model into a G-code script, which the 3D printer can understand and execute.
Finally, transfer the G-code script to the 3D printer and end up with all the steps in 3D printing. When the model is printed, it’s recommended to remove any unnecessary material and perform post-processing with water or mild agents to make the final product more appealing.
FAQs About 3D Printing
What Is 3D Pen in 3D Printing?
3D pens are handheld devices that can be used to create physical objects. They are similar in shape to traditional pens and consist of a filament feed slot, a heating tip, and a button to control the extrusion of material. Their working principle is similar to that of FDM 3D printers. By injecting PLA and ABS, they can extrude materials to create various shapes and structures in real life.
Currently, 3D pens are mainly used for repairing worn or defective models, artistic creations, and as teaching aids. For tasks such as prototyping and printing industry-specific tools, 3D pens have limitations and need to be used in conjunction with 3D printers.
Why Is 3D Print Not Sticking to Bed?
When the print bed is not properly leveled, the nozzle will move unevenly and cause the 3D print not to stick to the bed. Dirt on the print bed and incorrect nozzle height can also cause this issue. In addition, fast printing speed and low fusion temperature are also common causes. The former makes the material difficult to cool down, while the latter results in insufficient material adhesion to the print bed.
Therefore, when 3D printing does not stick to the bed, effective solutions are to clean and level the print bed, set the appropriate nozzle height, slow down the printing speed, and turn off the cooling fan. Besides, you can also try using a 3D printing raft. It will help the first layer adhere to the print bed, increasing the chances of a successful print.
Conclusion
Overall, how to 3D print involves model creation, 3D printer and material preparation, print slicing settings, and 3D printing. The whole process is not very difficult. However, as a beginner, you can run across difficulties such as printer installation, nozzle height setting, 3D print first layer ripples, and others. To avoid these troubles, might as well use this article as a starting point to work out all the common problems. With a full grasp of what 3D printing is and the 3D printing process, you will surely impress everyone with your work.