.png "Product News, Tutorials, Tips and Industry Insights - ZWSOFT Blog - Stay up to date on the latest product news, tutorials, tips, and industry insights from ZWSOFT staff and influencers. Here we provide everything you need to help you get the most out of ZWSOFT products and succeed in your career.")
A 3D printing raft is a common solution many enthusiasts and professionals use to address poor adhesion and ripples of the first layer. It also helps prevent warping or detachment from the print bed when a 3D printer works with ABS or high-temperature materials. As an aided structure, a raft improves print stability and quality, making it one of the most effective means to increase printing success rates.
In this context, this post will explore what a raft in 3D printing is, when to use it, and how to set up a 3D print raft. All the information is designed to guide you through a comprehensive understanding of rafts and help you achieve higher-quality printing results. Just scroll down to learn more!
| Note: If you’re looking for a new cost-effective 3D modeling software, ZW3D is your best choice. Not only does it offer a wide range of professional 3D modeling features, but the latest version, ZW3D 2025, has also been optimized for better performance. With a one-time purchase option, it’s an excellent choice for both businesses and individuals. If you’re interested, you can download a trial version. |
What Is a Raft in 3D Printing?
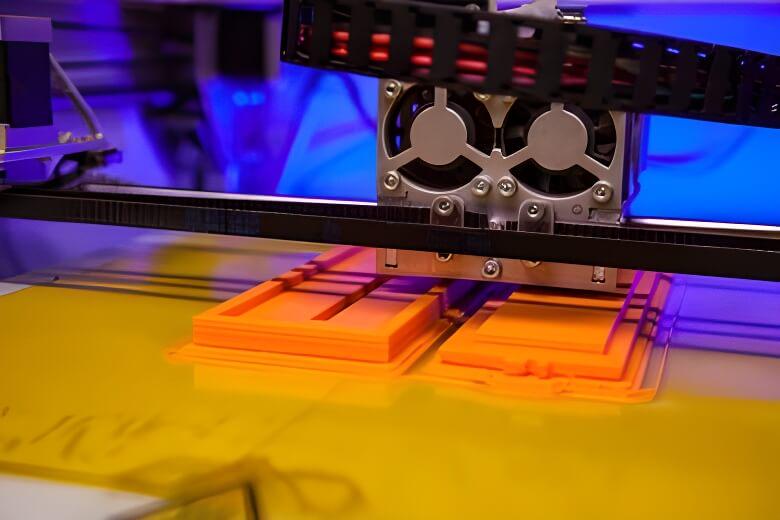
A 3D printing raft is a technical solution that emerged to address adhesion issues. It is a horizontal grid-like structure between the 3D printer nozzle and the print bed. Notably, a 3D printing raft is not a separate physical tool but a supportive element generated by 3D printing software and integrated into the printing process. It works with the print bed to provide a flat and stable base for the first layer and subsequent filaments (especially ABS), helping to improve print adhesion.
Advantages and Disadvantages of 3D Printing Raft
3D printing rafts do play a beneficial role in print quality and success rate, but it is not a cure-all for every scenario. Here is a breakdown of the advantages and disadvantages of 3D printing rafts.
Pros:
- Provides a base with the same texture as the print material, promoting stronger adhesion of the first layer;
- Ensures print quality and results, especially for materials that are prone to warping;
- Offers stable support for taller or more complex prints to prevent collapse with increased contact area;
- Can be easily removed during post-processing without damaging the print itself.
Cons:
- Consumes additional printing material to generate the raft, increasing costs and causing waste;
- Adds time to set up the correct raft parameters, thereby extending the overall project duration;
- Demands more post-processing and finishing if the raft leaves marks on the bottom of the print;
- Can be difficult to separate the raft from the print when the raft setting is very dense.
When to Use Raft When 3D Printing?
Given the practical strengths and drawbacks, 3D printing rafts are more like targeted solutions for specific problems. Because in many cases, common issues can be avoided and resolved without additional assistance simply by adjusting the printer’s parameters. However, if you believe a 3D print raft can enhance your creative process, ensure its use in the following scenarios to avoid unnecessary investment and waste:
- Use Warp-prone Materials: Materials like ABS and nylon are easy to warp during cooling. If you are printing objects using such materials, a 3D printing raft is recommended to stabilize the bottom and maintain its shape.
- Encounter Adhesion Issues: If 3d print doesn’t stick to bed properly despite the nozzle, print bed, and other printer settings being correct, you can generate a raft to enhance the bottom adhesion.
- Print Large or Complex Objects: Large or complex-shaped objects with a large base area can deform or detach. Using a 3D printing raft in this case can increase the contact area to ensure stable force conditions for the object.
- Fail to Calibrate Build Plate: If your print bed cannot be calibrated due to some reasons and hasn’t been repaired yet, try to create a raft before printing to improve the success rate.
How to Set and Adjust a 3D Printing Raft?
3D printing rafts require manual configuration in 3D slicing software to be effective. Otherwise, the 3D print raft stuck issue may occur. Generally, Cura, PrusaSlicer, Simplify3D, and other popular options all support raft setting and adjustment with similar operations. Below are the typical preset steps for a 3D printing raft in mainstream 3D slicing software.
Step 1. Download the Right 3D Print Software: Check the technical support details for slicing software compatible with your 3D printer, download the corresponding application, and complete the setup as instructed;
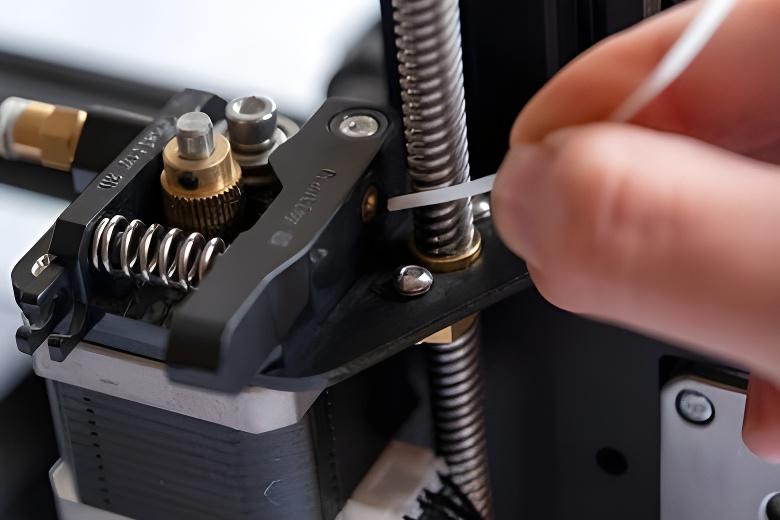
Step 2. Connect Software and Device: Follow the guide or user manual to connect the downloaded slicing software with your 3D printer and configure general printing settings. Also, don’t forget to calibrate 3D printer extruder and bed;
Step 3. Configure 3D Printing Raft Parameters: Locate the button to enable rafts. Set parameters such as raft base thickness, gap between the raft and the model, additional margins, print speed, and raft density according to your requirements;
Step 4. Test and Preview: Import your CAD model or select a test piece to initially print and evaluate the first layer and its adherence to the raft. If the results are not satisfactory, continue adjusting until you achieve good print quality, especially when your model incorporates 3D bridging structures in the middle;
Step 5. Save Settings: Ensure that the raft does not compromise the outcome of the print and save the configuration. Afterwards, export the G-code for printing, and monitor and adjust as necessary during the printing process.
FAQs About 3D Printing Raft
What Are the Differences Between Raft and Brim?
The debate of 3D printing raft vs brim is a long-lasting topic that users have been exploring to save costs and improve quality. Both methods offer similar benefits in stable structures and enhanced print success rates, but they serve different applications. The former excels with large or complex-shaped objects. The latter, on the other hand, is ideal for tall and narrow ones.
Additionally, they differ in size and placement. The raft will form a thicker base that covers the entire print bed, while the brim is a thinner structure surrounding the print edges. However, what sets them apart is their purpose. 3D printing raft aims to prevent bottom warping and provide overall support, but 3D printing brim is used to enhance adhesion for the first layer to prevent curling.
Is a 3D Printing Raft Worth It?
Whether to give a 3D printing raft a try depends on specific printing needs and materials. If you frequently face poor adhesion, ripples, or warping of the first layer, or if you aim to enhance print quality, a 3D print raft can be an effective solution. For specific scenarios where a raft can be beneficial, refer to the section “When to Use a Raft” in this post.
However, if there are a few problems during your 3D printing process or if project requirements are minimal, proper nozzle and build plate settings and cleaning may suffice. Please be aware that rafts are not a one-size-fits-all method. They can also lead to challenging problems like 3D printing not sticking to bed, 3D printing raft stuck, and others.
Conclusion
A 3D printing raft is a popular and workable technique to combat first-layer warping and provide a stable base for prints. While it’s not a panacea, it generally outweighs its drawbacks in improving print quality. More importantly, it is not the only available technique in 3D printing. Nozzle and build plate settings, 3D printing brims and skirts, and additional adhesives offer further avenues for exploration. By delving into these methods, you must elevate your creations to new heights.