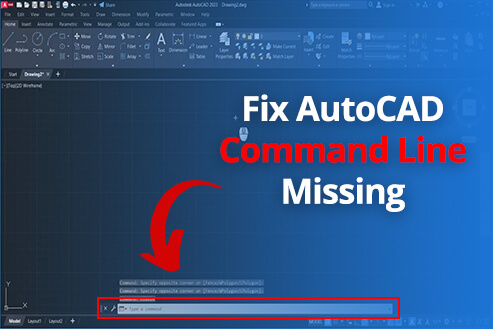
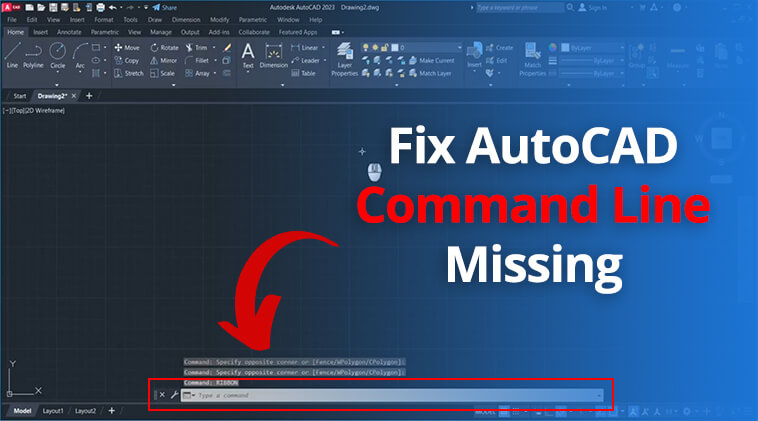
If you’re using AutoCAD and suddenly find that the command line is missing, command prompt not showing, or the command window disappeared, you’re not alone.
Many users encounter this frustrating issue where the AutoCAD command bar is hidden or the command line interface is not visible. Fortunately, restoring the AutoCAD command line panel is usually quick and simple.
In this guide, we’ll walk you through multiple methods to fix the AutoCAD command line missing problem. Additionally, we will also introduce an efficient and cost-effective AutoCAD alternative for those seeking similar functionality with improved performance and affordability.
Contents
- Solution 1: Turn on the AutoCAD Command Line
- Solution 2: Show the Command Line with CUI
- Solution 3: Reset the Command Line Position
- Solution 4: Adjust Screen Scaling Settings
- Solution 5: Try Switching Workspace
- Solution 6: Reset the CUIx
- Solution 7: Reset AutoCAD to Default
- Tip: Explore a Viable Alternative if AutoCAD Command Line Issues Persist
- Conclusion
| Related Article: |
Solution 1: Turn on the AutoCAD Command Line
If you find your AutoCAD command line disappeared, it may be unintentionally closed or shut down by someone else, then you can simply reopen that command line, which is very easy and can quickly resolve the problem. Here are a few ways to easily open the tool.
Via Keyboard Shortcut
The most direct way to reopen the AutoCAD command line is to use a keyboard shortcut. This shortcut is a common method in the AutoCAD environment and provides a straightforward solution without having to navigate menus or settings.
This approach varies by operating system:
- On Windows: Press “Ctrl + 9”
- On Mac: Press “CMD + 3”
Via Command
To reactivate the command line in AutoCAD via command, you can type “COMMANDLINE” directly into the AutoCAD interface. This action prompts AutoCAD to bring the command line back into view, allowing you to resume your work without further interruption.
If you find the command not working, it can be because “Dynamic Input” is disabled. You can choose one of the following methods to enable it:
- Use a keyboard shortcut. You can also toggle “Dynamic Input” on and off by pressing the “F12” key on your keyboard.
- Simply right-click on the “Dynamic Input” icon to toggle this feature on or off. When Dynamic Input is enabled, the icon typically appears highlighted.
Via Menu
To restore the command line in AutoCAD through the menu, follow these detailed steps:
- Locate the Quick Access Toolbar at the top of the AutoCAD window.
- On the Quick Access Toolbar, find and click the “Show Menu Bar” option.
- Once the Menu Bar is visible, navigate to the “Tools” menu, and select the “Command Line” option.
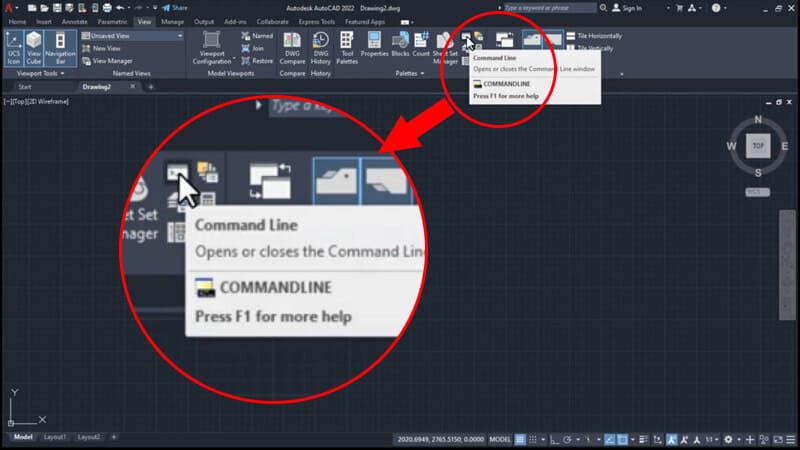
Via Ribbon
The Ribbon is a feature that organizes AutoCAD’s numerous commands and tools into a series of tabs and panels, making them easily accessible. Go to the “View” tab on the Ribbon, and then click the “Command Line” button to make it reappear on your workspace if it was previously hidden.
Solution 2: Show the Command Line with CUI
If you have verified that the command line is enabled (as described in Solution 1), but it is still not visible in the workspace, then you can use the CUI to display the command line. This approach is effective for restoring the command line if it becomes hidden due to configuration changes or workspace customizations, ensuring it’s docked in a preferred location on your screen for easy access.
This requires accessing the CUI settings and making adjustments to ensure that the command line element is active in the workspace configuration. Here are the detailed steps to let AutoCAD show command line with CUI:
Note: This method only works on Windows systems.
- Type “CUI” into the AutoCAD command prompt and hit “Enter” to access the CUI.
- In the “Customize User Interface”, select your current workspace, then choose “Customize Workspace”.
- Expand the “Palettes” section and select “Command Line”.
- Adjust its orientation to “Docked” and choose your preferred position (Below, Above, etc.).
- Click “Done” and “OK” to ensure the command line reappears in your workspace.
Solution 3: Reset the Command Line Position
If your AutoCAD command line is missing or appears off-screen and cannot be moved back, resetting its position can restore it to the default location at the bottom of the screen. This method is especially useful when using multiple monitors or after display changes that cause the command line to become inaccessible. Here are the steps to reset the command line position:
Step 1. Press Ctrl + 9 to toggle the command line visibility. If it appears but is undocked or off-screen, proceed to the next step.
Step 2. Type “LOCKUI” in the command line and press Enter.
Step 3. Set the value to 0 to unlock the user interface elements.
Step 4. Click and drag the command line window by its title bar and move it to the bottom of the AutoCAD application window. Once positioned correctly, type LOCKUI again and set the value back to 1 to lock the interface and prevent accidental movement.
Step 5. Type “WSSAVE” to save the current workspace to preserve the command line position.
Solution 4: Adjust Screen Scaling Settings
The command line loss in AutoCAD may be related to monitor scaling, not all screen resolutions match AutoCAD. This problem usually occurs because AutoCAD’s interface may not automatically adjust to the screen scaling settings, causing the command line to appear too small, off-screen, or not at all.
To adjust screen scaling settings for AutoCAD, you need to add a specific environment variable. This method is also exclusive to the Windows system, ensuring that the command line and other UI elements scale correctly and are displayed properly.
Here’s how:
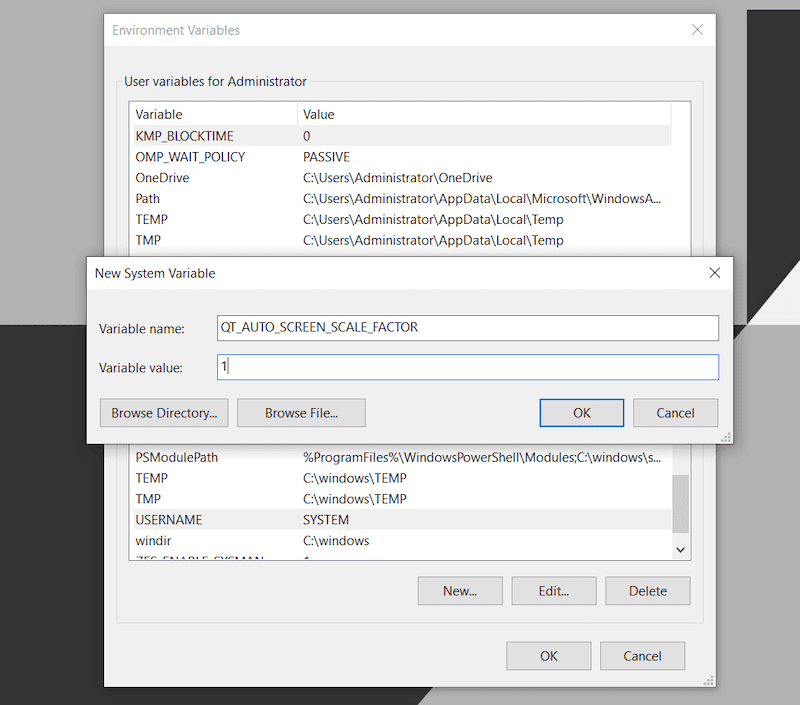
- Open the Windows search bar, type “Edit Account Environment Variables” and press Enter.
- In the User Variables section, select “New” to create a new variable.
- Set the variable name to “QT_AUTO_SCREEN_SCALE_FACTOR”.
- Set the variable value to “1”.
- Click “OK” to confirm and close all remaining dialog boxes with “OK”.
Solution 5: Try Switching Workspace
If the previous solutions did not work, you can try switching workspaces. Certain workspaces may have different settings and UI elements. By switching to an alternative workspace, you can often restore the command line if it’s configured to appear in that workspace. If the command line reappears, you may either continue working in the new workspace or try switching back to see if the issue has been resolved in the original workspace. By doing so, you can effectively reset the display of UI elements without altering deeper settings in the software.
To switch workspaces in AutoCAD and potentially restore the missing command line, you can follow these steps:
- Click the “Workspace Switching” button on the status bar.
- Select a different workspace from the list of available workspaces.
- Check if the command line reappears in the new workspace.
Solution 6: Reset the CUIx
If none of the above easy methods work, then you may want to consider resetting the CUIx in AutoCAD. This is a powerful solution for resolving issues such as missing the command line, as it effectively restores all user interface customizations and potentially problematic changes to their original default state. This is especially useful if the problem stems from a customization error or corrupted user interface settings.
Here are the steps to reset or restore the CUIx in AutoCAD:
- Type “CUI” in the command line to open the Customize User Interface window.
- Go to the “Customizations in All Files” dropdown, and right-click on “ACAD” at the top of the list.
- Choose to either “Restore acad.cuix” for the last saved state or “Reset acad.cuix” to the original installed state.
- Changes take effect after applying and clicking OK.
Solution 7: Reset AutoCAD to Default
Resetting AutoCAD to default settings is recommended as a last resort after all other solutions have failed to restore the command line. This method removes all customizations and restores the software to its initial state, often resolving stubborn problems that cannot be solved by other methods.
The process involves using AutoCAD’s built-in reset utility or manually modifying specific files or settings to restore AutoCAD to its original configuration right out of the box. This procedure will erase all customizations and should be used as a last resort.
To reset AutoCAD to default settings:
- For Windows users: Use the “Reset Settings to Default” app found in the AutoCAD application list from the Start menu.
- For Mac users: select “Reset AutoCAD” from the program menu.
Tip: Explore a Viable Alternative if AutoCAD Command Line Issues Persist
If you still can not figure out the AutoCAD command line missing problem after trying all of the suggested fixes above, then you may have to consider a more in-depth solution, such as reinstalling AutoCAD or contacting Autodesk Support.
However, if your dissatisfaction goes beyond this issue, perhaps due to the high cost of AutoCAD, or performance issues such as slow running and frequent crashes, then this may be a good time to consider switching to a more affordable and reliable alternative such as ZWCAD.
ZWCAD stands out as an alternative to AutoCAD by offering a balance of affordability and performance. It offers a full set of AutoCAD-like features and a familiar user interface, making it easy for users accustomed to AutoCAD to make a smooth transition.
ZWCAD’s performance is enhanced by a proprietary kernel that focuses on integrating the most relevant and desired features, ensuring faster performance with minimal system requirements as low as 2GB without overburdening your system.
Additionally, affordability is another key benefit of ZWCAD. It offers flexible licensing options, including subscriptions starting at $322/year and perpetual licenses starting at $899, making it more affordable for more users. This combination of functionality, cost-effectiveness, and performance makes ZWCAD an attractive option for both individuals and professionals seeking a reliable CAD solution.

Conclusion
In summary, this article provides a comprehensive guide to solving the AutoCAD command line missing problem, covering a variety of solutions ranging from simple interface tweaks to more in-depth modifications to system settings. With the right approach, anything from simple keyboard shortcuts to resetting software settings can be a straightforward solution to the AutoCAD missing command line problem. You can experiment with each of these solutions presented in this article until you finally solve the problem.
For those facing persistent problems, we recommend considering ZWCAD as an alternative. This specialized CAD software offers familiar features, greater efficiency, and more cost-effectiveness, making it a viable option for professionals looking for a powerful CAD solution without paying as much as AutoCAD.